-
Services
Why choose Us?
- Trusted Perth Smash Repair Specialists
- Expert Panel Beating & Collision Repairs
- Hassle-Free Insurance Claim Support
- State-of-the-Art Repair Facilities
- Quality Workmanship with Customer Satisfaction
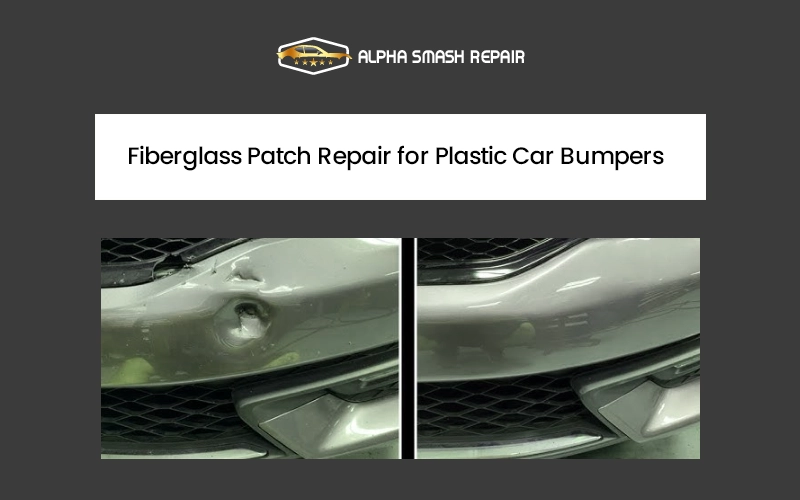
Car bumpers take the most hits, from dents and Car bumpers take the most hits, from dents and scratches to scuffs. With DIY fiberglass bumper repair, you can easily restore the showroom quality of your vehicle while saving money and time.
How Fiberglass Works on Plastic Bumpers
Fiberglass consists of woven glass fibers combined with a resin that hardens when cured. When applied to cracked or damaged plastic bumpers, it forms a protective patch over the affected area.
How It Works
Forms an added protective layer capable of withstanding minor impacts, vibrations, and stress
Tools and Materials Required
🧰 Essential Tools
- ✓ Fiberglass repair kit
- ✓ Sandpaper (medium-grit)
- ✓ Utility knife
- ✓ Mixing cups and sticks
- ✓ Body filler
🧽 Materials & Safety
- ✓ Plastic cleaner or degreaser
- ✓ Primer and touch-up paint
- ✓ Gloves
- ✓ Safety masks
- ✓ Safety glasses
Step-by-Step Fiberglass Repair Process
Clean and Sand the Area
Wash your car with soap to remove all dirt, debris, and oil. Once dry, roughen the surface using medium-grit sandpaper to ensure proper adhesion.
Apply Resin
Mix the resin and hardener as outlined in the repair kit instructions. Cover the damaged area by applying a thin, even layer of resin.
Place Fiberglass Cloth
Cut the fiberglass cloth larger than the crack or hole and place it over the damaged area. This creates a cracked bumper fiberglass patch that reinforces the weak spot.
Allow to Cure
Let the fiberglass fully harden. It needs a few hours to cure completely. Be patient during this critical step.
Sand and Smooth
Once cured, sand the area to smooth out uneven spots on the bumper. If needed, apply body filler for a seamless appearance.
Prime and Paint
Finish the bumper repair process with priming, painting, and final finishing to restore the car's original appearance.
✅ Advantages of Using Fiberglass
Cost-Effective
Saves money compared to bumper replacement
Durability
Provides strong reinforcement against cracks
DIY-Friendly
Easy-to-use DIY kits are available
Versatile
Works for small cracks, holes, and minor structural issues
⚠️ Limitations of Fiberglass Repairs
-
1 Fiberglass is brittle and may shatter or crack under strong impact
-
2 Cannot absorb shocks or impacts effectively
-
3 Requires specialized skills and knowledge for lasting results
-
4 Improper application can make bumper more prone to damage
-
5 Resin and hardener mixture needs quick application
Fiberglass vs Epoxy Bumper Repair
Which Method to Choose?
Choose Fiberglass For:
- ✓ Larger cracks or holes
- ✓ Structural damage
- ✓ Areas needing reinforcement
- ✓ Long-term durability needs
Choose Epoxy For:
- ✓ Small cracks and splits
- ✓ Cosmetic repairs
- ✓ Quick fixes
- ✓ Surface-level damage
Both methods are cost-effective. Determine the extent of damage and select the right approach for your specific situation.
Strong, Smooth, and Cost-Effective Bumper Repair
The fiberglass repair method provides strong and smooth results while helping you save money by avoiding costly bumper replacements.
Key Takeaways
- ✓ Perfect for minor to moderate cracks
- ✓ Achievable with patience and right tools
- ✓ Professional results at home
- ✓ No need for expensive shop visits
Important Note
For deeper or severe damage, consult a professional repair team
Invest in quality repair to maintain your car's longevity and appearance.